Wednesday, August 12, 2020

Half Bath Refresh


As I sit home for weeks and weeks and weeks trying my best to teach my littles while also trying to work, my my mind has been racing thinking about all the things I could be doing around my house. There’s so much potential and so many projects I want to get started and the longer I’m trapped here the more projects I come up with. Do you have any idea how frustrating it is to be home but not have the time or ability to take advantage of this homebound time? I’m pulling my hair out over here.
I’ve decided to make a list and each week try to complete one project to be checked off my list. I love making lists and find it very satisfying to check things off. I’m a dork like that. That leads me to my post because.... I checked off an item!!! I will pause the applause. 
My downstairs half bath is done. This is actually the first room I’ve “completed” since we moved into this house so I’m pretty jazzed with how it turned out. I painted the walls with Sherwin Williams Seasalt which is a very nice light color with hints of gray, blue and green depending on the light. It’s a great neutral that’s not white or gray. 
Before
https://drive.google.com/uc?export=view&id=1tpSgi5g4ivjaAWbeJGaZMu0pBKHKXCz1
After
I also switched out the plain pedestal sink for the Larissa wall mounted vanity in white washed oak which I picked up at Home Depot on super sale. I love that it has drawer where I can store extra toilet paper and other bathroom necessities; something that was lacking with only having a pedestal sink previously. Added this new matte black faucet, then painted the hardware on the sink along with my towel and toilet paper holders with this satin black spray paint. I love how they turned out. Satin black spray may be my new favorite thing. I’ve been spraying everything with it to give dull outdated items a fresh new look. Sorry for the detour, back to the bathroom. 
Before
https://drive.google.com/uc?export=view&id=1pn66mELs0a0G0zSb3s3BagHx1XQDRE7g
After

The biggest and most difficult part of the redo were the floors. The tile was blah but I didn’t want to rip it up so I decided to try my hand at painting and stenciling the tile. I’d seen some beautiful results online and figured it was worth a shot. I love the way it turned out but let me tell you, it was not as easy as the tutorials I’d read led me to believe.  It took me three weeks working on and off to finish. I’m thankful that my husband and boys were so patient while this room was under construction. I may do a post of how I did it and what I’d do differently if I were to do it all over if there’s any interest because, as I said, I love the results and might try it again under different conditions. The stencil I used is the 12” Kerala stencil from Cutting Edge Stencils. The painted tile method is pretty inexpensive compared to replacing tile just be prepared to spend more time on this project. 

I finished off the room with accessories from Hobby Lobby and a new light fixture from Lowe’s which I spray painted parts of with my fave satin black to tie together the black hardware and faucet with the gold mirror. 
Here are a few more pictures of this space. It may be small but it’s so satisfying to have this one done. One project down, 999 left to go. 


Monday, July 20, 2020

Feeling Peachy


This time of year always reminds me of summers spent at my grandparent’s house. They had a garden, a variety of fruit trees, and lots of scuppernong vines. Considering how much stimulation my children require, they would have thought how I spent my summers when I was their age as boring but I loved it. I'd go for long walks each morning with my grandma, then we'd pick corn, beans, and cucumbers, we'd shell beans, can tomatoes, pick apples and pears, and then I'd watch as she'd cook up something amazing. These experiences with my grandma created memories I will always cherish. She taught me that cooking was a fun, creative activity with delicious outcomes.

So when summer rolls around I like to take advantage of all the fresh fruits and vegetables which are at their peak. I love fresh fruit and vegetables, and even attempt to grow my own. Although I’m not the farmer my grandad was, I try. So far this summer I've grown plenty of cucumbers, three tomatoes, and lots of basil. The deer keep eating my bell peppers and most of my tomatoes, while my zucchini refuses produce anything. My tiny garden is a teaching me a lot of what not to do next year. Thank goodness for all the local farmers who know what they're doing and keep me stocked in fresh fruits and veggies.

One of favorite summertime fruits is the peach. Contrary to popular belief, South Carolina is the peach capital of South producing twice as many peaches as our Georgia neighbors. I know a good peach when I taste one and a ripe, juicy peach is pretty much perfection. How does one elevate a peach? Look no further than the perfect peach cobbler. Top that peach cobbler off with vanilla ice cream and you’ll have something so good you it will leave you speechless. If you've been looking for the perfect peach cobbler recipe then you'll have to give this one a shot. You won’t regret it. 

Perfect Peach Cobbler

Ingredients:

  • 3 cups peaches, fresh or canned, halved then quartered
  • 1/2 cup butter, softened
  • 1 cup sugar
  • 1 large egg
  • 1 tsp vanilla extract
  • 1 cup all purpose flour
  • 1 tsp baking powder
  • pinch of salt
  • dash of nutmeg
  • dash of cinnamon
  • non-stick cooking spray

Instructions:

  1. Preheat oven to 350 degrees. Grease a 2 quart baking dish with non-stick cooking spray.
  2. Spread sliced peaches evenly into the prepared dish.
  3. In a mixing bowl, mix the butter and sugar together until fluffy. Add the egg and vanilla until well combined. 
  4. Mix flour, baking powder, salt, nutmeg, and cinnamon in a separate bowl until combined.
  5. Stir the flour mixture into the sugar and egg mixture until just combined. The batter will be thick with a consistency similar to that of cookie dough. 
  6. Spread batter over the peaches evenly trying to cover the peaches as best you can.
  7. Bake for 35 to 40 minutes or until golden brown. 
  8. Remove from oven and let sit 10 minutes before serving.

Enjoy on its own or ice cream or whipped cream. Prepare to have your taste buds rejoice! 


Friday, July 17, 2020

China Cabinet Remodel

https://drive.google.com/uc?export=view&id=16SjOwgSVEARfRSsfZ2nLd3dRoXPOlEcG
Anyone else scroll fb marketplace on the regular looking for their next project? I usually have a few items in mind that I hunt for but I'm not in a rush. I’m typically looking for the right piece at the right price. I overlook bad paint and outdated style, and actually focus on these shortcomings because these pieces are typically overlooked, besides I’m on the hunt to remake the piece to my liking. If you’re diligent you can get pieces with lots for potential for a little dinero. 
For example, take my newest remodel. I bought this china cabinet for $50. I didn’t care for the orangish wood or the knobs but saw it had potential. 
https://drive.google.com/uc?export=view&id=1wj7Ij143FzS9rqLxei2ujlWNrUCYdOOb
I wanted to paint it to coordinate with the chandelier in my dining room that is black with natural shades and gold accents. 
https://drive.google.com/uc?export=view&id=1F8waTmulI3IIjp_6AMcWDdG6kp8TcVC8

For paint, I used Heirloom Traditions All-in-One paint in Iron Gate. This is my third project using this paint line, so I thought I’d share my process. The All-in-One paint is great for this type of project. It’s a chalk based paint that includes a primer and sealer so you don’t have to do those steps, hence all-in-one. It comes in 31 colors and has a low luster, matte sheen and smooth finish. 
Tools:

  • Deglosser
  • Clean towel
  • Pint of Heritage Traditions All-in-one Paint 
  • Brush, oval synthetic fiber 
  • Applicator sponge

Process:

  • Remove the glass, doors, and all hardware.
  • Prep all surfaces that will be painted by cleaning them well with deglosser. Liquid sandpaper or Krud Kutter work as well. Apply the deglosser to the wood with the synthetic brush. Let it sit for a minute or two and then wipe the area clean using a clean, dry towel. You can use a scrub brush on harder to clean areas. Clean the entire piece and make sure it is dry before proceeding to the next step. 
  • Apply a generous amount of the All-in-One paint using a clean synthetic brush working quickly in small areas. 
https://drive.google.com/uc?export=view&id=1BZ2S5iOueEHYSCDUL1jB4ycCrOsu2TVE

I like to work a two square foot area by applying paint using the brush then go over the brushed area with the applicator sponge to dapple the paint and remove the stroke marks. The paint should self-level.

 https://drive.google.com/uc?export=view&id=11YkF6Z2TgPfFViRmrcG1tEv6x9Eo4uVM
  • This paint dries quickly so it is best to work in a room without circulating air, that is too warm, or any condition that may speed up the drying process. Repeat this process over the entire piece. The first coat will not be perfect but that’s okay because by second coat it will start looking nice. 
  • Next, allow time for the first coat to fully dry. It says two hours but I typically wait at least twelve hours. Apply your second coat in the same manner as the first, working quickly to apply paint and dapple. You do not want to overwork any one area or paint may come off. If this happens, allow the area to fully dry before repainting. 
  • For this piece I only had to apply two coats of paint. Lighter colors may require 3 or more coats of paint. Once the final coat of paint has dried completely, again I’d wait another 12 hours, add hardware and doors. 
  • For this piece I also added this peel and stick wallpaper to the inside back wall of the china cabinet.
https://drive.google.com/uc?export=view&id=1KiIuHfzR8cj1bd47YLGEZBF8616gtUyG
I replaced the hardware with these brushed gold knobs
https://drive.google.com/uc?export=view&id=1POgcRpHYnXA3NAtCo_Ge0YLt0ed0Focy
I hope this little tutorial helps you complete your project and reassures you that you can refinish furniture quickly and beautifully. 
https://drive.google.com/uc?export=view&id=1q0XF2aM3iiMX8lS4H08TRcLvFI4Ks3Mf
Now I’ve got to figure out what I want to put in here. It will be nice to free up some space in my kitchen cabinets and I may take my wedding china out of hiding and actually use it. 
https://drive.google.com/uc?export=view&id=1d5pQo-4iicXgJD_w47MhPVHjU3Tgg1sm
Feel free to post comments or questions. 


Friday, July 10, 2020

Quarantine Baking: Chocolate Cherry Blondies

https://drive.google.com/uc?export=view&id=1Eb2Qqqj8Ky_v5G7w6xMHQz_Nynb8Q7KU
It feels like we’re on day 649 of quarantine, and I have no idea what day or month it is. Everyday just seems to blend into one reoccurring day. Like Bill Murray in Groundhog Day, I am living the same day over and over, the only difference is time is passing. While it feels like it should still be March, half the year has passed. How is it July already?


Well now that I’ve gotten that off my chest, how are y’all handling our current predicament? 

Me and my boys, the hubs included, are getting lots of bonding time so there have been lots of board games and a little too much tv. The other day Emmett mentioned that he wanted to take a cooking class and I jumped at the opportunity to take him up on this. We knew we wanted something sweet with basic ingredients that was simple enough that an 8 year old could make it. I searched Pinterest and came across this recipe from Averie Cooks for Chocolate Chip Cherry Bars. Her recipe was easy to throw together and the outcome is delicious. I added pecans and definitely recommend doing so if you have any on hand. This is a great base recipe so you could add any in number of things such as shredded coconut or any nuts you prefer. I used fresh cherries and think they work best as frozen may result in a soggier blondie. Emmett favorite part was shooting the pits out of the cherries using this pitter.
 https://drive.google.com/uc?export=view&id=1Hpw3e1zI8-mervlppP28_oC60nmmcmYB

CHOCOLATE CHERRY BLONDIES

      Ingredients


    • 1/2 cup unsalted butter, melted (1 stick)
    • 1 cup light brown sugar, packed
    • 1 large egg
    • 2 teaspoons vanilla extract
    • 1 cup all-purpose flour
    • 1/4 teaspoon salt, optional
    • 3/4 to 1 cup semi-sweet chocolate chips
    • 1/2 cup pecans, chopped
    • 1 cup, cherries, pitted and halved (fresh is recommended)
    • Instructions
      Preheat oven to 350F. Prep an 8-by-8-inch pan (or loaf pan, mine is 5-by-8-inch) with nonstick cooking spray. 
      Stir melted butter and brown sugar until well combined. Add egg and vanilla to sugar butter mixture and stir until well combined.  
      Next, add in the flour and salt, stir until just combined. It will be thick like cookie dough. 
      Fold in chocolate chips, cherries, and pecans into batter. Pour batter into prepared pan.
    • Bake for 30 to 35 minutes, or until edges begin to slightly pull away from sides of pan and center.  
    https://drive.google.com/uc?export=view&id=1z54-517Pu_k7Osy0Z9Xl8sl3HSHLoq1Hhttps://drive.google.com/uc?export=view&id=16EfcaG9Z0QFiGzdw0tEq4fLVGChZ3XUQ

    While it may be very difficult to wait, allow bars to cool before slicing. Store in an airtight container.
  •  https://drive.google.com/uc?export=view&id=1K5byjOAN1RfPFuD5kS-8fXlK8cd0q48d

    These blondies are delicious on their own, but serve them warm with a scoop of vanilla icecream a la mode to really take them to the next level. 

    https://drive.google.com/uc?export=view&id=1mVVpxWUETGwYejGpZPadaAsOgin_OgjT

    Let me know if you make these and what you think. I hope you all stay healthy and enjoy this time with your family. While it may seem stressful, we are building memories with our kids that they will treasure for a lifetime. They won’t care about the shows they watched but they will remember the experiences you created and time spent together. 

Wednesday, April 15, 2020

Staying Safe- Simple DIY Face Mask Tutorial

Never in my wildest dreams did I think I'd be hunting online for face mask tutorials to make for myself and family, but that's life right now. The new normal is weird but hopefully temporary... I think I'm about to go into TJ Maxx and Target withdrawals. With the current social climate being so precarious, I'm taking to precautions to be as safe as I can when I do have to venture outside of my home (these excursions are few and only for necessities).


I wanted to make these masks as a way to protect myself as well as those I may come into contact with. 
When looking for a pattern to make I had a few boxes I wanted to check. First, I wanted a simple sewing pattern with only a few steps. I'm no seamstress and only have basic sewing skills but I found this pattern very easy to figure out. I'm self-taught, so sewing is a learning game for me.
Second, I wanted to be able to add and remove a liner. I found the pattern I used on Hobby Lobby's website here. This site has both the PDF pattern with instructions and an easy to follow video. Here are the instructions:

Simple DIY Face Mask Tutorial

SUPPLIES:

  • 1⁄4 yd. fabric 
  • 14" elastic (I used 1/4" elastic but you could use fabric ties, ribbon, or elastic cording)
  • Straight pins
  • Iron for pressing fabric
  • Scissors
  • Sewing machine

STEPS:

  1. Cut 15" x 8" piece of fabric. 
  2. Fold fabric in half and sew in 3 inches on each side, leaving open space in middle for filter.
  3. Cut two 7" pieces of elastic. Place a piece of elastic between layers of fabric on each side of mask, pinning ends at corners.
  4. Sew edges.
  5. Turn piece right side out and press.
  6. For pleats: Place pins, starting 1" from bottom on either side. Continue placing pins with the following spacing: 1", 1⁄2", 1", 1⁄2", 1". These pleats are important, because they help the mask expand completely to cover your nose and chin.
  7. Fold pleats and match up pins.
  8. Sew around piece, close to edge.
Step 2

Step 6

Step 7

All Done!

A few things to note, pressing the mask with a hot iron before each step makes sewing go smoother. If making the mask for children, I would reduce the size of fabric in step 1 to probably 13" or 14" by 7" to 7 1/2" and the elastic length in Step 3 to 5" or 6". I did not do this so the masks were a little too big for my 8 and 4 year old. I ended up making a little insert that they can wear on the back of their heads that helps the mask fit snuggly. I remember seeing this idea for nurses whose ears were raw from wearing masks that go around the ears. I used a 3" x 4" scrap of fabric which I folded and sewed together on the inverse then flipped right side out pressed, made sure the ends were tucked in, and then sewed closed. I added two buttons which the mask could attach to and it worked perfectly. 

My son's mask with the back of the head attachment


There you have it. I made four and it took me about an hour and half. I think I'll be faster the next time but I was a little slow making sure I followed everything in order to do it correctly. Even though it took a little while, I really like how they turned out. 
Let me know if you make them and how they turn out for you.


Wednesday, November 1, 2017

The Countdown to Christmas is On


I hope that you had a fun Halloween with all your little ghouls and goblins. My boys enjoyed the heck out of trick or treating even though there were a few meltdowns at the beginning. Once we got over the tantrums, the evening was really fun. We always start out as a huge group with the other kids on our street and then terrorize visit all the houses. Our neighborhood is fantastic at Halloween with decorating and just about everyone gives out candy... the boys now have enough candy to last them until next Halloween!
Me and my little skeletons. Emmett wanted to be a skeleton, so Oliver and I followed suit.

Let the mayhem fun begin!
............................................................................................................

Now that Halloween is officially over it's time to prepare for the holidays, especially Christmas. I love Thanksgiving but I also love all the prep for Christmas so why not begin the shopping lists now. 

Budget
First off, I have a Christmas fund. Every pay period I have money automatically drafted and put into my Christmas fund which I can't access until November 1st. This works get because I save up all year so I don't end up having to run up my credit cards and worry about how I'll pay it off come January. I don't miss the small amount each pay period but it really adds up to make for a nice little budget. Pierce has one too. 
If you don't have a Christmas fund, I suggest starting one now so that next year you won't have the stress or worry of how you'll afford Christmas. Instead you can focus on the fun of giving. Which leads up to...

Deals
This is the best time of year to find some fabulous bargains. It so hard to stick to shopping for others when I see so many things I want for myself. I've got to remember that instead of buying things for myself I need to tell other people those items as I find them. I don't know why people say I'm difficult to shop for... I find things I want all the time 😋
Check weekly circulars and sign up for online sale notifications (you can always unsubscribe after the holidays). 
To me Black Friday is one of my favorite days of the year. I love going through the circulars, getting up early, and hoofing it to the stores but now I also spend a fair amount of time shopping online. A lot of the BF deals can be found online with free shipping. I try and buy the items I want online as early as possible (some are available Thanksgiving night) in order to get those items marked off my list, then I head to the store to get the in-store only deals on Black Friday. 
Also, shop now. Sometimes you can find just as good of a deal now as you can on BF. Check out sites like BFADS and Best Black Friday to prep ahead of time.
Do you Cartwheel? If I haven't said it before...  I love Target! Download the Target app and sign up for Cartwheel if you haven't done so already. Starting today they will have a daily toy deal that will be 50% off. You have to use it in the store but this is a great way to stock up on toys for the kiddos at out of this world prices. 
For example, today's Cartwheel deal is 50% off Safe Start electric scooters, making it $50.

The only issue with this is I find so many deals I can go a little overboard. I am trying hard to control myself this year since the boys don't need many toys. When I shop I scan everything through the Cartwheel app and usually have at least a few items that come up with an additional percentage off. It's so easy to use and who doesn't love saving money. Also, get a RedCard and you'll get another 5% off everything you buy at Target plus free shipping from target.com. I have the debit card so it comes directly out of my checking so they're aren't any monthly statements or finance charges. Woohoo!
Give
This past weekend I went through the boy's toys and clothes to get rid of the things they've outgrown or don't play with anymore. When it comes to the toys I let the boy's help pick out what they want to donate. It's good for them to be appreciative of what they have but also be charitable and realize that it's nice to pass along items to children who don't have as much as we do. Emmett used to want to keep everything but now he is excited to give and is enthusiastic about donating his toys. 
And a few things that made me chuckle...
Related image

I know I'm getting what I want for Christmas because I already bought it for myself.


Sunday, October 22, 2017

This and That and Shopping

Whoa! This weekend was exhausting. Pierce had to work all weekend so it was just me and the boys. I kept us busy and by the end of the day we were all exhausted. I seriously couldn't keep my eyes open past 8:45 last night. Tonight I finally got a little quite time to myself now that everyone is tucked asleep in their beds so I figured I share a little of what we did.

Emmett's last soccer game of the season

Fall Fest in the neighborhood

Oliver may have powerlifting in his future since he can lift over half his body weight

Petting the ponies at my favorite Charleston spot, Magnolia Plantation 

Oliver feeding the deer and getting some licks

Selfie Time!!!

Roasted sweet potatoes and brussel sprouts to go along with an herb marinaded pork loin
............................................................................................................

Now that I've got a few minutes to myself to play online, I also did a little shopping. Old Navy has great price points plus you can get an extra 20% off when you use code SWEET.
Here are some of my favorites that you'll probably see me wearing very soon.


Fit & Flare Velvet-Knit Dress- This would be perfect to wear to a Christmas party


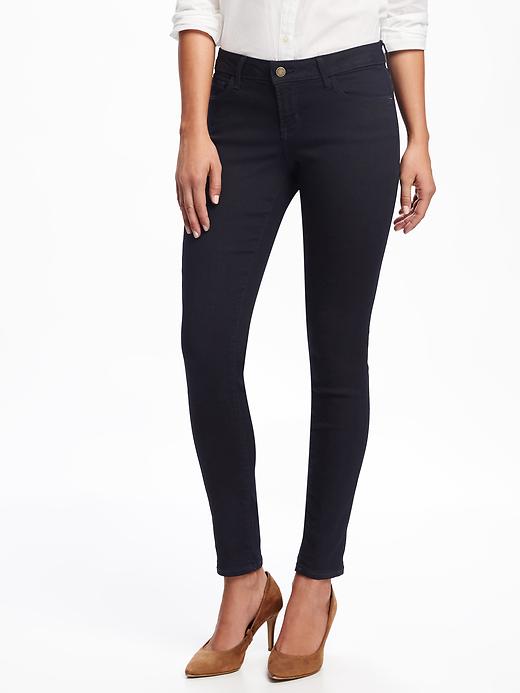
Low-Rise Rockstar Jeans - on sale for $19!!

product photo
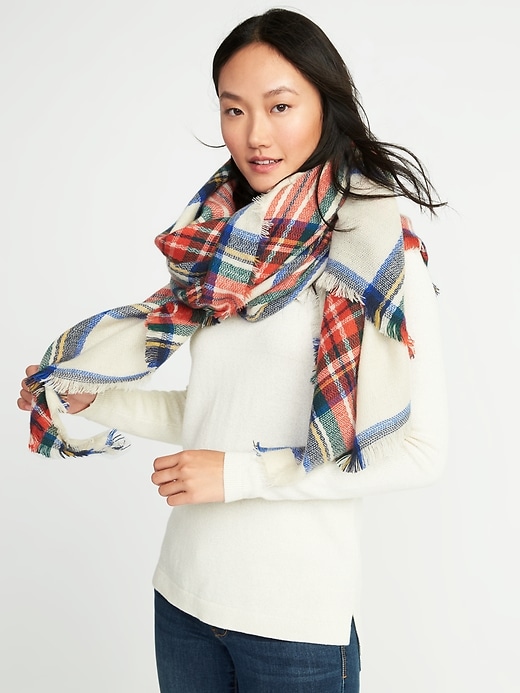
Flannel Blanket Scarf - only $20

product photo
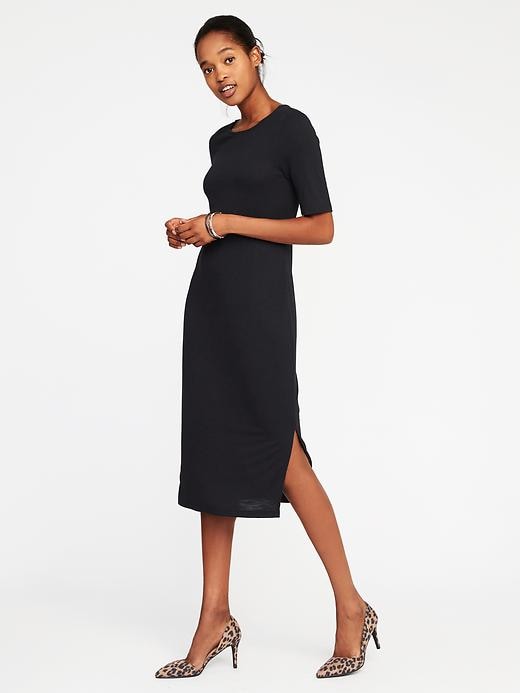
Jersey Tee Dress- This will be great with a few accessories like the scarf from above

product photo
Metallic Flats- Gold shoes... of course!