Showing posts with label diy. Show all posts

Tuesday, September 1, 2020

DIY Porch Leaning Welcome Sign- Tips on Getting Crisp Edges with Vinyl Stencils


Have you ever used a stencil of cut vinyl only to have the paint bleed through and ruin what should have been crisp lines? Well I've figured out how to fix this issue and thought I'd share an easy fix to this problem as I go over how I created a porch leaning Welcome sign.
I bought a porch leaning sign from Hobby Lobby after Easter at 75% off, so with only $6 invested I was fine with how it looked since it had ‘Welcome’ on one side and ‘Happy Easter’ on the other. I displayed the ‘Welcome’ side over the summer but with fall right around the corner I wanted something that could change with the seasons and be less country and more my style. I found a black and white sign on Pinterest which served as the inspiration for changing up what I had and turning it into what I envisioned. I wanted to share my process in case you too are interested in creating a sign that can be used year-round. 
As I stated, I used a prefabricated leaning sign. It measures 60” tall by 9” wide. You could easily and cheaply cut a piece of inexpensive lumber to size which could be used for this project. If so, make sure you sand before painting. 
First off, I cleaned my sign since it had been outside and had some dirt on it. Next, I painted the entire front black using a small paint roller. I had a sample quart of SW Tricorn (black) left over from another project so this is what I used. I applied 3 coats allowing a couple hours of drying time between each coat. If you’re not painting over a preprinted sign, 1 to 2 coats is probably sufficient.
Once the black is good and dry, I waited 24 hours between the final coat of paint and applying the vinyl stencil. I cut out my stencil using my Cricut Explore 2. For this project is cut out 2 laurel leaves, ‘Welcome to Our’, ‘H’, ‘M’, ‘E’, and stripes.
I applied the stencil to the sign and taped around the stencil to cover any exposed areas that could accidentally get painted. In order to get crisp edges when using vinyl as a stencil, you want to apply a coat of Mod Podge to the stenciled area prior to painting. I use a foam brush to apply the Mod Podge. Allow the Mod Podge to dry completely, then paint in your stenciled area. **This coat of Mod Podge is the secret to getting crisp lines when using vinyl stencil, so do not forget this step.**
I used a foam brush to dab the paint onto the stencil. I used acrylic craft paint for both the white and green applying two coats of each color allowing the paint to dry for a couple of hours between each coat. Once the final coat is dry gently removed your vinyl stencils. Finally, apply a coat of Mod Podge to the entire sign. 
Your sign is done but now it’s time to create a mini seasonal sign to represent the ‘O’ in ‘HOME’. Since fall is right around the corner, I decided to go with a pumpkin. Using a 10” wood round which can be found here, I drew out the shape based on the size of the open area on the sign which happens to be around 8.5” x 8.5”. I painted the sign before cutting it out. Next time I will sketch my shape, cut out, and then paint. I used a jigsaw to cut out the pumpkin but since the wood I used is thin it split and splintered into areas that I’d painted. I sanded the shape to smooth it all out, then repainted the areas that had splintered. 

I applied Command Velcro strips to the back of the pumpkin then applied it to my sign. All I’ll have to do for my next seasonal mini sign is affix new Command strips to the large sign and press the mini sign into place. This should make it easy to add new signs as well as reuse old ones. 


I really enjoyed creating this sign and I’m looking forward to making new mini signs for it as the seasons change. Let me know if you have any questions and please share your projects with me if you decide to make your own seasonal porch sign. I’d love to see them!
Happy crafting,
Jessica

Wednesday, April 15, 2020

Staying Safe- Simple DIY Face Mask Tutorial

Never in my wildest dreams did I think I'd be hunting online for face mask tutorials to make for myself and family, but that's life right now. The new normal is weird but hopefully temporary... I think I'm about to go into TJ Maxx and Target withdrawals. With the current social climate being so precarious, I'm taking to precautions to be as safe as I can when I do have to venture outside of my home (these excursions are few and only for necessities).


I wanted to make these masks as a way to protect myself as well as those I may come into contact with. 
When looking for a pattern to make I had a few boxes I wanted to check. First, I wanted a simple sewing pattern with only a few steps. I'm no seamstress and only have basic sewing skills but I found this pattern very easy to figure out. I'm self-taught, so sewing is a learning game for me.
Second, I wanted to be able to add and remove a liner. I found the pattern I used on Hobby Lobby's website here. This site has both the PDF pattern with instructions and an easy to follow video. Here are the instructions:

Simple DIY Face Mask Tutorial

SUPPLIES:

  • 1⁄4 yd. fabric 
  • 14" elastic (I used 1/4" elastic but you could use fabric ties, ribbon, or elastic cording)
  • Straight pins
  • Iron for pressing fabric
  • Scissors
  • Sewing machine

STEPS:

  1. Cut 15" x 8" piece of fabric. 
  2. Fold fabric in half and sew in 3 inches on each side, leaving open space in middle for filter.
  3. Cut two 7" pieces of elastic. Place a piece of elastic between layers of fabric on each side of mask, pinning ends at corners.
  4. Sew edges.
  5. Turn piece right side out and press.
  6. For pleats: Place pins, starting 1" from bottom on either side. Continue placing pins with the following spacing: 1", 1⁄2", 1", 1⁄2", 1". These pleats are important, because they help the mask expand completely to cover your nose and chin.
  7. Fold pleats and match up pins.
  8. Sew around piece, close to edge.
Step 2

Step 6

Step 7

All Done!

A few things to note, pressing the mask with a hot iron before each step makes sewing go smoother. If making the mask for children, I would reduce the size of fabric in step 1 to probably 13" or 14" by 7" to 7 1/2" and the elastic length in Step 3 to 5" or 6". I did not do this so the masks were a little too big for my 8 and 4 year old. I ended up making a little insert that they can wear on the back of their heads that helps the mask fit snuggly. I remember seeing this idea for nurses whose ears were raw from wearing masks that go around the ears. I used a 3" x 4" scrap of fabric which I folded and sewed together on the inverse then flipped right side out pressed, made sure the ends were tucked in, and then sewed closed. I added two buttons which the mask could attach to and it worked perfectly. 

My son's mask with the back of the head attachment


There you have it. I made four and it took me about an hour and half. I think I'll be faster the next time but I was a little slow making sure I followed everything in order to do it correctly. Even though it took a little while, I really like how they turned out. 
Let me know if you make them and how they turn out for you.


Thursday, September 28, 2017

Leaf & Book Page Banner


In addition to planning Oliver's party I've also been trying to get the house ready for fall by incorporating little bits of autumn decor throughout the house. One of the main reasons I love this time of year is that it gives me an excuse to decorate. 
I've got mums on the porch, fall flowers on the mantle, and pumpkins all over the place. Today I wanted to share a little craft you can make in less than thirty minutes for about $10. I was hunting Pinterest for ideas for my mantle when I came across a cute fall banner on Sondra Lyn At Home which inspired me to make my own. 
I bought all of my supplies from Joann's except for the book. I used an old book of fairy tales and pulled out the pages for the stories I didn't care far. 

Leaf & Book Page Banner


What you'll need:


Twine
Clothes pins
Faux leaves 
Ribbon
Book pages
Serrated scissors


Hang your string onto the mantle. Cut out your leaves from the book pages using some of the smaller and a few of the larger leaves as templates. Clip together a book leaf to a faux leaf and arrange on the string. Once all the leaves were hung, I added in the gingham ribbon. I'm really loving gingham this fall so I thought it added a nice touch. 

That's it! So easy and so cute. If you've got any of the ribbon left, you can add it around the room to a vase or wreath to tie everything together.


I echoed the gingham from the ribbon in my centerpiece. I also plan on making a throw pillow for the sofa in this same pattern. 

Happy Fall! Have lovely day.


Sunday, January 8, 2017

Refreshing a Tired, Painted Console Table


Years ago my mother-in-law gave us this painted console table. It's been well used but doesn't fit my style anymore. I've been contemplating buying a console table because this one is a little wide and I don't like the look of it. I've looked and looked and I can't seem to find the right piece. Everything is either too wide, too short, or too expensive. So this weekend I had a few free hours and thought I would strip my tired, painted console too see if I could get a better look. This simple project took me 3 hours and cost about $20. 

First, gather your materials:
  • painted furniture in need of a good stripping
  • drop cloth
  • stripper, I used Citrustrip 
  • mixing cup
  • plastic scraper brush
  • gloves
  • eye protection 
  • paint brush, DO NOT use foam brushes
  • steel wool

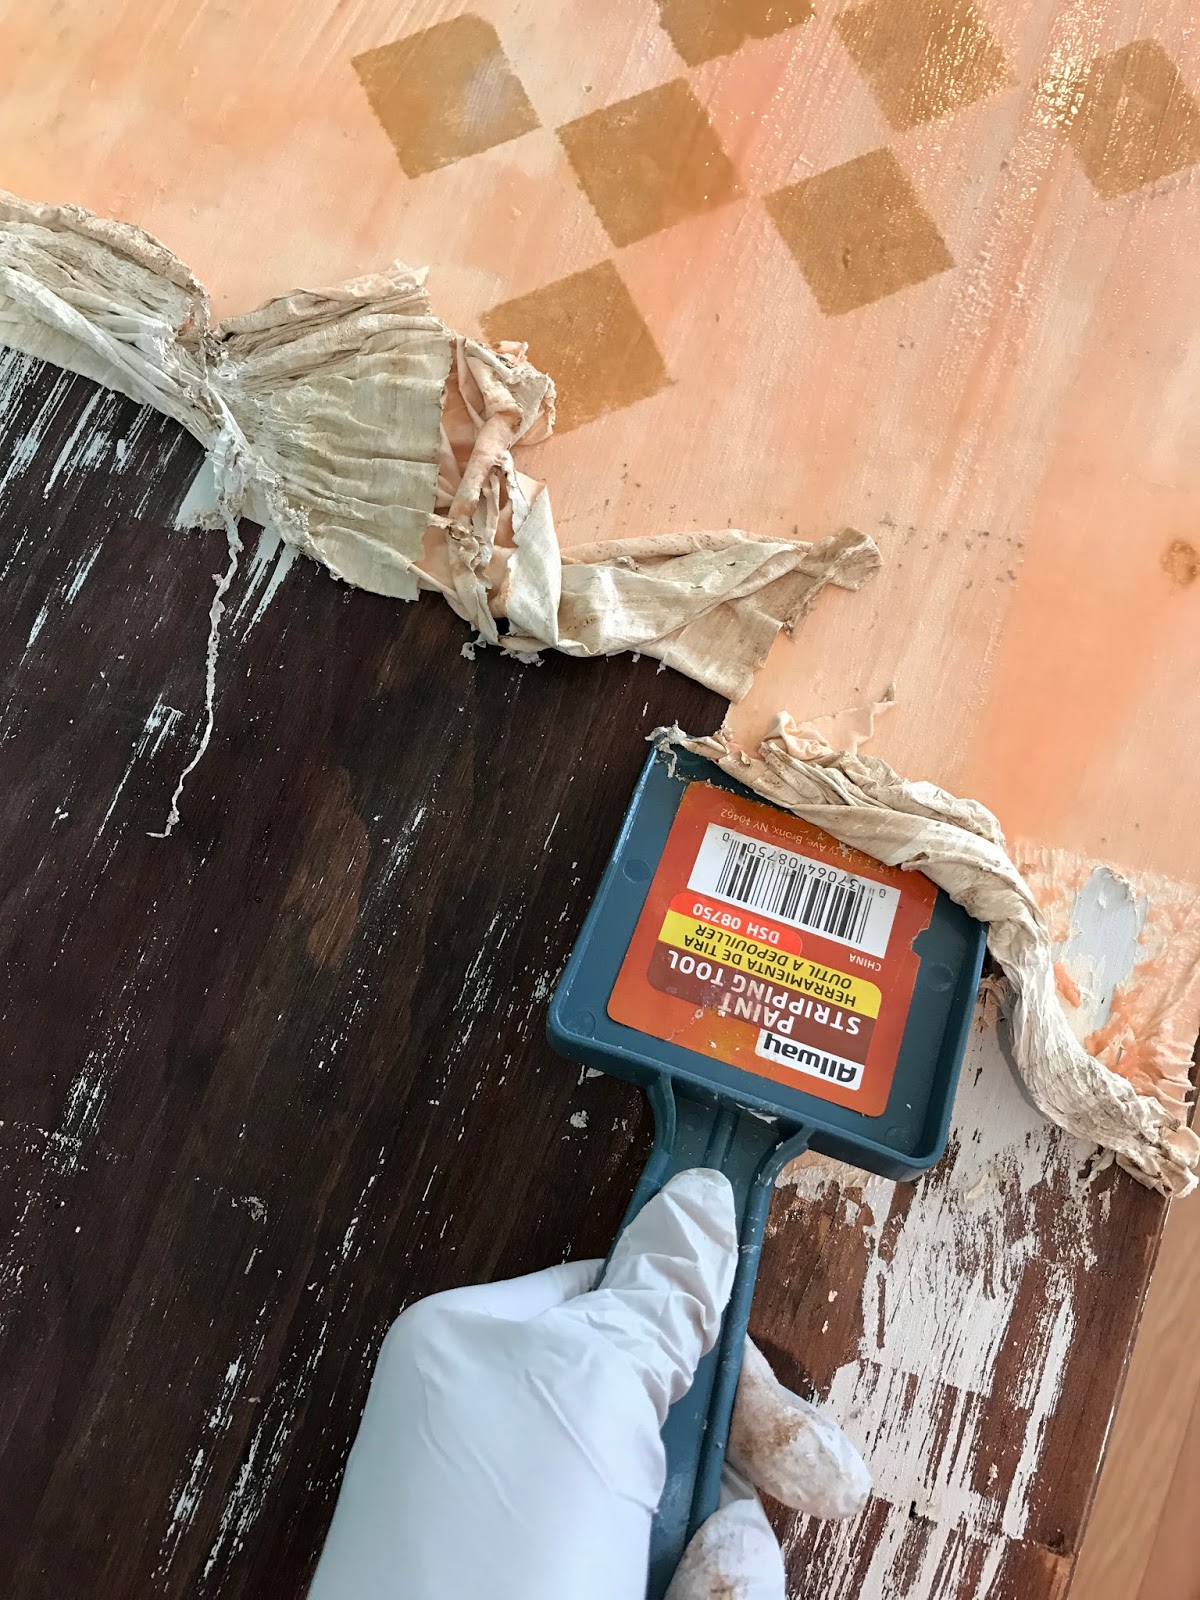
Second, make sure your painted furniture is clean. If you are inside I recommend putting down a drop cloth and doing so in a well-ventilated area. Put on your gloves and eye protection. Pour the stripper into a thick plastic or metal container. Do not use a thin plastic cup because the stripper may make it deteriorate. The same goes for foam brushed... do NOT use them. I learned the hard way as the stripper slowly melted the foam away 😬. Anyway, once you have the stripper ready start applying a generous coating to your furniture with a paint push. Once the entire piece is coated, wait. I could see the paint starting to peel back in some areas within 15 minutes. Even if areas don't bubble, it's still working.
stripper applied and waiting

I waited about 30 minutes before I tested an area and it was good to go. I put my gloves and eye protection on and started scraping off the paint with the plastic scraper. You want to scrape with the grain of the wood so you don't splinter it.
I scraped the entire table removing all the gel and as much paint as I could using the scraper. After I got all that I could that way I took the rough steel wool and scraped the entire piece trying the smooth the wood and removing all the remaining paint that I could. Next, I went into the detail area (around the legs) and used a toothpick to get the gel and paint out of those areas. Finally, I cleaned the entire piece with a household cleaner.

BEFORE- such a pretty paint job😜                                  AFTER - some of the paint remains

I either missed a few areas with the stripper or they were tougher because there are a few paint patches that remain. I'm sure I could have gone in and applied stripper again to those areas but I really liked the way it came out and decided the leave the paint that remained. It gives it character. I was planning on white-washing the piece after removing the paint but it looked so nice as it is, that I'm going to leave it. It ended up better than I had hoped. So if you have a piece that could use an update, give stripping a try. It was easy and with a little elbow grease I was able to salvage what I had and love it more that I could have imagined. Now to find some cute pieces to add to my table and the wall behind.
The Finished Product!

While the piece is still a little too wide for the space, I think I'll use it until I find the perfect console for this space. I may end up white washing it in the future but I think I'll leave it like this for a while. Thanks for checking my little tutorial out. Feel free to ask questions if you have any.